Showing posts with label scrapbooking. Show all posts

Thursday, November 12, 2015

That Time Alpha Heroes Became a Boutique Publishing House

Hey, it's Thursday again. Conference Thursday!  Let's talk about swag.

Here's the sad truth: I'm just not that clever about coming up with awesome swag ideas. But I really wanted to have something to put in the swag bags at the Reading Until Dawn conference.

I'm not sure where I first found out about the use of signatures in bookbinding. I think it was random topic at a writers' workshop in regards to children's books, and how picture books always had either 8, 16 or 32 pages. Fascinating! I decided to play around a little bit with bookbinding and make some chapbooks of the Five Words stories that were created just for Alpha Heroes' readers.

The first step is to learn origami. OK, not really, but kind of. I took a sheet of standard 8.5"x11" printer paper and folded it in quarters, so each page was 4.25"x5.5". Staple the vertical folded edge, and once you slit the top folded edge, you have a small, 8-page book. I numbered the pages without making that slit or stapling, and then unfolded to see what my text layout needed to be. It looks like this:


Now, maybe you are a better wizard with your word processing application of choice, but I knew right away I was going to need to do this in more of a layout program than a word processor. Someday I'll get around to learning Publisher, but for this project I used Visio.

Belle's and Candy's stories just fit into 7 and 8 text blocks, respectively, with a little tweaking. For reference, Candy was just under 2300 words, and Belle was right around 1900. To look the most like a real printed book, I set up the formatting to remove white space between paragraphs, add a first-line indent for each paragraph, and to justify to both edges of the margin.

Margins are tricky!  I used .25" margins for the top, bottom, and outside edge, and a little more space on the interior bound edge. It worked out OK, but I would leave a little more than .25" the next time because the photocopying wasn't quite as precise as I would've liked. I adjusted them a couple of times and it required a lot of editing and tweaking, partly because I found out that Visio does some funky things when pasting in from Word, so I needed to check formatting every time I pasted. Bleh. It works much better if you lock in the margins before you break it all up into individual blocks.

I got a rough sense of how the pagination was going to work out by setting the margins to 3.5". I tried to set the page height to 5" but it didn't really help me visualize the way I wanted to.  There might be a way to do it but I just moved on.

I converted from one to the other by manually creating text blocks in Visio of the width I wanted and copy/pasting from the Word doc.  If/when I do this again, I'll start by lining up the 8 blocks side by side, paste everything in, do all the formatting, and double-check that for skipped or double-pasted words or lines. Once the pages are lined up right, then I moved them into the correct location and orientation as shown above.

Once I was 100% sure that everything aligned properly, I took the master pages to Staples, where I was very happy to learn that they would not only make my copies for me, but would also fold them for a very nominal fee.  Given that I of course waited until the last minute, saving me that time and effort was golden.

Did you know that in the old days, if you bought a new book, you used a knife or a sharp letter opener to slit open the signatures? It's true! You'll have to take my word for it, because I can't find a succinct reference that backs me up, but trust me, it's true.  I thought it would be OK to leave the top fold intact and have the recipients open up their own, but this sort of confused people, and it was hard (ish) to do once the pages were sewn in.  Next time I'll go ahead and cut them.

The next thing I need to obsess about was covers. I considered leather, pleather, vinyl... anything that I wouldn't have to hem or worry about fraying.  After thinking about how much time would be involved in cutting and costing out some options, I decided to go a little more downscale with cardstock.  But I was not looking forward to cutting out covers.

Readers may recall that I am a bit of a scrapbooker, so I'm pretty familiar with the cardstock and fancy-paper section of my craft store, but I've never been that interested in making cards. But! it turns out that card blanks look a LOT like a chapbook cover.  I found a standard size that was a little more than 4.25x5.5 and ordered 100 pieces from an online store. I considered several ways to do the cover art, including a custom stamp or stickers, but I decided to go with the simplest thing and use my printer. This meant I couldn't go too dark, so I chose a medium blue color.

Yay! But the best-laid plans, and all that.  What I got were plain rectangles of 4.5x6 card stock, not folded cards.  Well, I decided to make them work, and put together about 45 books using two pieces for each book.  I bought some cute washi tape to make a binding and cover the raw edge (in a leopard pattern, for the Beauty/Beast story, get it?!)

But I had another 45 or 50 books I wanted to make, and I was out of time for ordering. So I hit up the craft store and bought a package of A2 cards in a silvery color, and held my breath to see if the printer ink would stick.  Luckily, it did! (mostly).  These cards were smaller than I wanted, measuring exactly 4.25" x 5.5". I thought the books would look better if the covers were a little bigger than the pages, but I ended up liking the closer fit better.  Here they are before binding:


How did I put them all together, you ask? How did I turn cardstock and folded printer paper into a book? I ran them up on my sewing machine! It worked very well.  I was a little worried I'd break the needle, so I bought a package of heavy-duty needles, but it was fine. I didn't even need them.  I aligned the pages with the cover, clamped them with a large binder clip, and then ran a seam up the bound edge.  Isn't it cute?


One tip, if you've never sewed piece parts before, is that you can run the books through the machine one after another and cut them apart when you're done.  You have a little chain of books connected by thread in between.  It just goes quicker than stopping and starting.

As a finishing touch, I used removable glue dots to stick one of my blog cards to the inside front cover:


My production assistant did a great job with these. (She's 11 and very crafty.)

Last comment on the whole process: the delicate washi tape binding on other books, with the separate top and bottom, didn't hold up very well.  It did look very good, but just wasn't sturdy enough. Since I liked the way the pre-folded cards looked better, I'd probably plan on just using them without the tape, but if I did want to use tape on the binding, just for cuteness, I'd probably pick a narrow DuckTM pattern.

Now, if I were a really good DIY blogger, I'd have scads of lovely photos with perfect lighting and just so styling for each step, most likely involving homemade tassles and tiny succulent plants and maybe some shiny confetti. (Errr, it's possible that I'm spending too much time on blogs like Emily Henderson's and Oh Joy!).  As it is, I can't even find any of the Beauty chapbooks to show you the difference in the finished products (dammit! they're around here somewhere!)  Next time, maybe.  But if you ever feel like making a few copies of a short story, these turned out very cute and I think the recipients at the con liked them a lot.  And I must admit, I did have fun making them!

-----------------------------------------------------

If you thought about going to the Reading Until Dawn Conference, but for whatever reason decided against it, I would recommend that you go over the Facebook group and torture yourself with the photos of what a great time we had. (I'm assuming that if you did go to the con, you're already following the awesome photos that are going up). Like so:

Me and Super-Woman Casey

If you want to kept informed of planning for the next one, Casey has just opened up a newsletter sign up -- go subscribe and don't even think about missing the next one.  My collectible publications and I will be there.

Tuesday, April 28, 2015

Fangirl Scrapbooking

Whether you're headed to RT, another book con, or a fan conference of some other stripe, you might enjoy collecting and putting together a scrapbook to keep your memories, even if you don't think of yourself as a "scrapbooker."

I bought into the scrapbooking Kool-AidTM over a decade ago when my first daughter was small.  I've spent a pretty good percentage of my disposable income on tools and supplies (but still less than I spend on books!).  I hadn't been blogging long before I realized that I would never be able to hold on to all the signed books I was collecting, so when I went to RT for the first time in 2012, I combined two of my favorite pastimes.  If you think you'd like to give this a try, here are some of my top tips for scrapbooking your fan experience:

1. It all starts with the book...
I like 12"x12" books for my family scrapbooks, which gives me a lot of room to spread out.

Because I rather hope that these books will be appreciated for more than one generation, I use only archival materials and have page protectors on everything.  I mostly stick to papers, photos, and pens, and keep embellishments more minimal.

However, for my fan book, 12x12 is too bulky and awkward to travel with; and as for archival? Nah. I figure anything goes!  This one strictly for my own pleasure, fun and remembrance, and will not likely mean much as a legacy to anyone else.  So bring on the slick bookmarks and coverflats, 3-D paper flowers, key chains and pins, lace and ribbon, maps, brochures, tickets, boarding passes - if I can stick it to the page, it might be in there.  I chose a smaller book and a collection of neutral, sort of vintagey and typography-based accents and papers.  I love this book because of the pretty flourishes, the color, and the mix of plain and lined pages, pocket pages, and photo-insert pages (not shown, but they're there!)

A little introduction to the book, why not?

Here's a blog with some cool examples of what people have done with this type of book.

There are a lot of other options too.  If you're an Instagram kind of person, I saw an article recently for Chatbooks, which looks like an easy and inexpensive way to bind up some IG shots.  Although if you want to use it for autographs, you'd have to get creative and maybe create a book ahead of time of all the authors you want to meet and have them sign their page.

You could go the other direction and be very deconstructed -- you could even use larger flat swag like cover flats or postcards as the base page, and collage photos and signatures on top of them.  Punch a hole in the corners, add a binder ring, and voila!  Here is a similar example, using paint chips as the base.  At the scrapbook event at RT14, this is what we made (with card stock for pages).  You could easily add your flat swag onto it!


2. Consider your style. 
A kit or collection might be a good choice. I really love the kraft-paper pages in the Smashbook (and others) because you can add light or dark elements and they still stand out nicely.  I find that with white background pages, I keep trying to fill in the space and my pages get too busy.  If you choose something like mine, 7 Gypsies and Tim Holz (and others) specialize in that kraft/black/vintage style, but most craft supply places will have lots of bits that will work.

You might prefer lighter and brighter, pastel and dreamy, cartoony/humorous, or maybe a more beat-up industrial-looking style.  Or you might make each page different to suit the photos, souvenirs, or your exact mood at that moment.

Some of my favorite pre-made elements for this book are little journal and accent cards, like this:

From scrapbook.com
You can layer a small photo or bit of memorabilia on top, write out some thoughts about that person/book/experience, or have your author sign it, if you don't want to haul your book around everywhere.  You could also just cut up some squares of lined paper and keep them with your conference stuff if you don't want to buy pre-made ones.

I also like to use ribbon, die cut frames, tags, and arrows. 

Cathy Maxwell on an RT12 panel

Washi tape is super-popular now -- I do like it but I find myself in sort of a rut and using only one or two mostly black patterns.  However, it comes in a whole rainbow of colors and all kinds of styles and patterns.  It's nice because it pulls double duty-- adheres things to the page while drawing attention to them.  You can also make a quick frame or arrow with it.

No photo on this one - signature plus swag


3. Take good pictures.
If you want your book filled with photos of you and your favorite authors, but you're camera-shy or self-conscious about how you look in photos, there are a few tricks that can be handy to know.  Maybe team up with a friend (or the person you're getting deeply acquainted with while you wait in line), practice using each others' cameras, and learn these tips:

  • Don't lean back, because: double-chins happen (ugh).  If the author is behind a table, it's all going to work better if she leans forward, or, if she doesn't mind, if you go behind the table with her.
  • Don't lean over or down.  If she's sitting, bend your knees and keep your back and neck straight.
  • Photos taken from higher up are more flattering.  If you've got a big group, try to get someone tall, or up on some steps to take the group shot.  Take it from high enough that everyone's face is tilted up.
  • If you're a sometimes yes, sometimes no, person about makeup, this is probably the time to say yes.  Just sayin'.
  • Have your friend take 3 or 4 shots just in case someone blinks or blurs.  Once everyone is in place, it shouldn't take too long.  (If the line is long behind you, maybe just two.)
  • Get some variety in your shots.  If almost all of them are you+author, from the waist up, that's fine and all but you can add some interest by taking some detail shots -- piles of books, pretty table decorations, a cluster of foofy cocktails; some pulled back shots -- the skyline of the city, the marquis of the hotel, a panoramic shot of the thousands of people at the bookfair; some things that interest you -- a series of shots of awesome shoes or costumes, or the random person carrying the tallest stack of books, the carnage in your hotel room after you and your roommates have dumped all your swag everywhere.
4. Take notes.
  • You might not want to scrapbook things immediately-- I don't; for one thing I still need to get photos developed.  I'm sorry to say that I have a few signatures that... I don't remember who they are.  I can't read 'em.  Oops.  I got smarter at RT14 and added small post-it notes to many pages if I couldn't read the signature.  Once photos are developed, you can add them along with whatever swag you've got.  Or nab a bit of washi tape and whack down the author's bookmark or trading card and you've got the start of your page.
  • Twitter sort of worked as a photojournal for me.  I tweeted my favorite photos along with a 140-character comment, so when I look back through my media feed later, I have great prompts to jot down a little memory for the page.
  • Remember those journal cards? You can write those up in real-ish time too and keep them until you're ready to assemble the page.
5. What supplies do you need?
The sky is really the limit with scrapbooks these days, especially if you're not too concerned with archival quality.  Browse pinterest a little bit before you commit. BUT: my advice, especially if you are just starting, is keep it simple.  My recipe for a beginner:
  • Small book, around 8x8
  • Small pack of papers in the same size as your book in a colorway that appeals to you.  Bonus points if it contains a sticker alphabet and some journal cards.  Here's an example by Tim Holz. You might not need 36 sheets but if you look closely you can see several of them can be cut down into journal cards or smaller embellishments.  You might notice in the shots of my book, you don't see any deco paper.  I just didn't need it for this book (so far-- I'm not ruling it out entirely).
  • One or two rolls of washi tape in a color you love.  These add up fast, so unless you know you like it, start small.
  • Fine tip sharpies in several colors.  Grab a silver one, as it shows up beautifully on dark backgrounds.
  • Post-it notes, for illegible signatures
  • Tape runner to adhere light, flat items (photos and paper). There are a zillion brands, I don't really have a favorite--and Glue Dots for adding heavier things like key rings, charms, thicker ribbon.  If you will be assembling your album later, you could leave these home.
  • Pair of scissors and hole punch.  Again, you could wait until you get home to use these, but if you want to do stuff on site, this is about the minimum.
You can make a fantastic album with nothing more than these things (or less, if you're a true minimalist!), your photos, and your goodies from the conference. I really really love mine!

Last tip: PUT YOUR NAME AND CELL PHONE NUMBER ON THE INSIDE COVER!  I lost my book at one of the parties at RT12 and was so sad! Luckily it was turned in to lost and found but it sure would've been simpler if someone could've just called.

I hope you find this useful and that you end up with a wonderful book of memories, no matter what you decide to commemorate.  Plus, you just never know what might happen when you hand a blank page to an author:


Sunday, February 1, 2009

I, Scrapper

This week, the Weekly Geeks ask, What are you passionate about besides reading and blogging?

Before I became slightly obsessed with blogging, I was a little obsessed with scrapbooking. I started with Creative Memories in 2002. My daughter was two at the time, I had scads of photos, and everywhere I went, I saw scrapbooking stores and supplies. I found a CM consultant through a friend of a friend, and what I expect to be a lifelong “hobby” was born.

I use quotation marks because I do think it’s a little more than a hobby. We live in a media rich age, so it’s unlikely that someday my albums will be found and considered some kind of archeological treasure. But I hope that my girls will appreciate the effort and that my love for them will come through the pages. I feel like that sometimes gets lost in the day-to-day effort of keeping up with household chores, and teaching the kids the lessons they need to get by in life. Sometimes I can be kind of a negative person, and scrapping helps me focus on the positive. I think that their kids and maybe their grandkids will enjoy the peek into their lives, too.

A couple of years ago, I started doing digital scrapbooks, too. It’s hard to express how much I love these. I live far from my extended family, so I do one “yearbook” per year (I’m in catch-up mode right now, so I’m doing two: the current year, and an older one—I’ve got 2004-2008 covered), and then I print out multiple copies of the same book. It's a fair investment of time for the first one, but then with a press of a button, everyone who wants one can have one. (This is nice for class gifts, scout troops, sports teams, etc, too). There are a number of places where you can get these books made, but I use Creative Memories. Their photo organizing software has some nice hooks into their digi scrapbooking software, and from there it’s very easy to import templates and have books printed. Lots of people use Photoshop or Photoshop Elements to digi-scrap, but my one encounter with P-shop some years back left me very askeered.

As handy as the digital scrapping is, I don’t think I’ll ever give up my paper and pens and adhesive. As most “crafty” people will tell you, the process is as important as the product. It’s a tactile experience, and it balances my professional life which is extremely abstract. I like playing with colors and proportions, and telling a story and, in direct contradiction to why I love digital scrapping, I love paper/traditional scrapbooks precisely because they are handmade and one-of-a-kind.

My dad is an amateur photographer, and I have a lot of bitter-sweet memories of waiting, waiting, waiting for him to get the focus exactly right, and squinting into the sun because he didn’t want shadows on our faces. And film and processing were expensive, so I was taught to be thoughtful about the composition, try to get it right the first time, take few photos, and treat the prints very, very carefully. I have every print I took between 1978 and 1990 or so labeled, numbered, cross-referenced to the negative strip, and placed in sticky-page albums in chronological order.

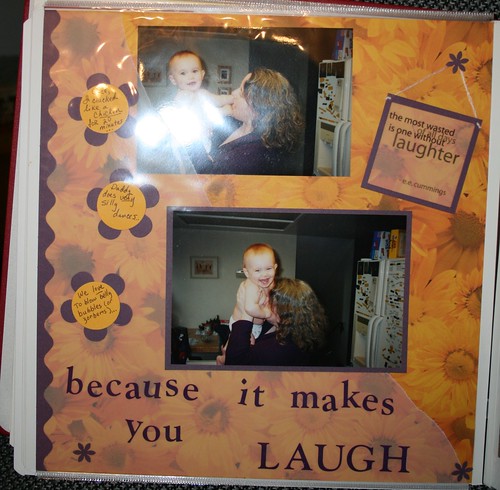
So when I first started scrapping, I was ALL ABOUT the photos. Showcasing them, arranging them, choosing complimentary colors, etc. Then I came across a couple of photos of me blowing zerberts on Yvette’s tummy. Objectively, they’re pretty bad photos. Cluttered background, dark boring colors, my face is buried in one of the photos. But Yvette’s smile just lights up the world in one of them. This is the result I ended up with (sorry about the glare!):


And that’s when I had the epiphany: it’s about the MEMORIES. The photos, the journaling, the accents – these are the tools I use to try to keep vivid the joys of the moment. I think after that, my pages improved a lot.

I still have trouble keeping organized, now that I’m freed from the tyranny of physical film, but I’m getting better. Nadia’s books are closer to up to date, and Yvette is starting to journal some of her own pages – which is so cool.


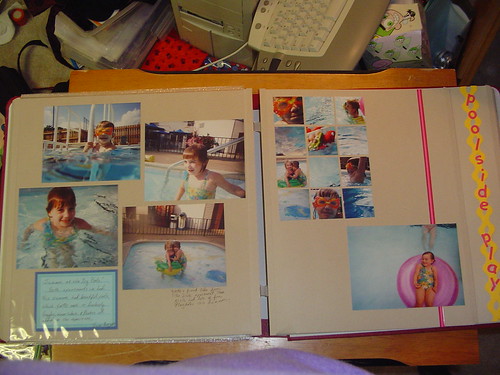
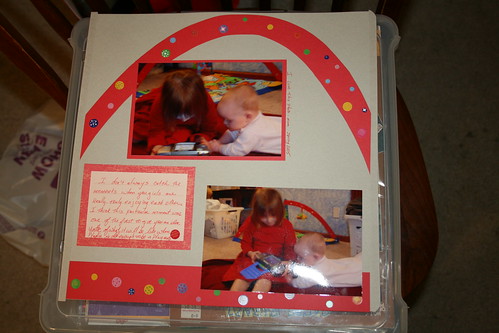
For more of my favorite pages, you can check out my Flickr Scrapbook Set here.

And, say the Weekly Geeks, Get Us Involved.

Geeks, if you’re blogging this week about a collection you have, consider photographing your favorites (or the whole collection) and assembling a small scrapbook. For each item, write a few words – how and when did you acquire it, and what makes this one special? Find some themed paper or stickers and it will go together in a snap. If your items are valuable, include the receipt or pricing info, and you’ll have a valuable record for insurance purposes, too.

Knitters – I know you’re out there – a fun scrapbook project would be a scrapbook with a page per project – you could include a snip of the yarn, a photo or scan of the pattern, a photo of the project in progress and then complete, and journal about why you chose it, who it was for, how long it took, what problems you ran into. Or, do a scrapbook for one big project, taking photos along the way and show how it evolves. The yummy colors and textures of the yarn are just begging for some great photos.

Scrapping can be as simple or elaborate as you want it to be. Choose materials that are acid and lignin free, to keep them from crumbling or yellowing in the future. Don’t use those sticky-page albums I mentioned – they’re terrible for your photos. All you need to start with is a good album, adhesive, pen(s), and photos. Extras like patterned paper, stickers, die-cuts, and doo-dads are fun and I’d never do without them entirely, but which ones you choose and to what extent you use them is a stylistic choice.

A good place to start is with the Creating Keepsakes website-- there are tons of links, articles & blogs. I confess that I don't actually do much online with my scrapbooking hobby, so I don't really follow any scrapbook blogs except for my friend and upline, Erin (find regular updates in my sidebar!). A local Creative Memories consultant can give you one-on-one advice, encouragement, and will often hold “crops” where you can get together with other scrappers, away from the kids and the pets and the household chores and really focus on working on pages.


If you’re like me and you like to just dive in to a huge project with a lot of faith and not much of a plan, this is a hobby for you – all scrapbooks grow one page at a time, and there's no wrong way to do it. If you’d rather start small, choose a themed scrapbook, like a vacation. There are lots of “collection” type products on the market that are pre-coordinated so your book will have a cohesive, polished look from start to finish. (Personally, I like to tailor each page to the photos so you never know what kind of style jump you might get when you turn the page, LOL).

Last October, after 6 years of thinking about it, I went ahead and signed on as a consultant with Creative Memories. So folks, I am a PRO now (ha ha) and if you seriously want some one-on-one help, just shoot me an email.

Watch This Space

I’ll add in some links over the week here to other scrappers and Geek passions that would lend themselves to scrapbooking. ;-)

Visitors

  © Blogger template Coozie by Ourblogtemplates.com 2008

Back to TOP